LDAP with auth_pam and Python to authenticate against MySQL

If that title looks familiar, it is because a few months ago I posted about LDAP with auth_pam and PHP to authenticate against MySQL.

The good news is that recompiling the connector for Python is a lot easier than for PHP. With PHP, the complexity was due to there being one monolithic package to recompile. The bad news is that there is a slight hitch with Python.

Skip down to the hitch and how to compile MySQLdb for use with auth_pam plugin.

As a quick reminder, here is a repeat of the background:

Background


There are two plugins that can be used. From the documentation, the two plugins are:

  • Full PAM plugin called auth_pam. This plugin uses dialog.so. It fully supports the PAM protocol with arbitrary communication between client and server.
  • Oracle-compatible PAM called auth_pam_compat. This plugin uses mysql_clear_password which is a part of Oracle MySQL client. It also has some limitations, such as, it supports only one password input. You must use -p option in order to pass the password to auth_pam_compat.

Percona’s MySQL client supports both plugins natively. That is, you can use auth_pam or auth_pam_compat and use the “mysql” tool (or “mysqldump”, or mysql_upgrade, etc.) and you are good to go. Given the choice, we would all use auth_pam, under which clients DO NOT use mysql_clear_password.

Not all clients support auth_pam, which is the main problem. Workarounds have called for using auth_pam_compat over SSL, which is a perfectly reasonable way to handle the risk of cleartext passwords – encrypt the connection.

However, what if you want to use auth_pam, and avoid cleartext passwords all together?

If you try to connect to MySQL using Python, you will receive this error: “Client does not support authentication protocol requested by server; consider upgrading MySQL client.”

Back in 2013, Percona posted about how to install and configure auth_pam and auth_pam_compat. The article explains how to recompile clients to get them to work:

The good news is that if the client uses libmysqlclient library to connect via MySQL, you can recompile the client’s source code to use the libmysqlclient library of Percona Server to make it compatible. This involves installing Percona Server development library, compiler tools, and development libraries followed by compiling and installing the client’s source code.

The Hitch


The hitch with Python is that there are a few different ways to connect to MySQL with Python. In fact, MySQL has written a Python connector, called mysql-connector-python. According to the documentation for mysql-connector-python:

It is written in pure Python and does not have any dependencies except for the Python Standard Library.

This means we cannot recompile mysql-connector-python to use the libmysqlclient library from Percona that supports auth_pam – because it does not use the libmysqlclient library.

However, mysql-connector-python is not the only way to connect MySQL to python. There is a mysqlclient-python package, which provides the MySQLdb module for connecting to MySQL. According to the documentation:

MySQLdb is a thin Python wrapper around _mysql

And the docs for the _mysql module say:

_mysql provides an interface which mostly implements the MySQL C API.

It is using the standard library, and we can recompile it. Here is a mirror of the Perl recompilation process for MySQL.

Recompiling MySQLdb to support auth_pam

Step 1

“Install Percona yum repository and Percona Server development library.” This is not a problem, do what you need to do to install Percona-Server-devel for your version.

Step 2

Install a package manager so you can build a package – optional, but useful, if you ever want to have this new client without having to recompile. As in the example, I chose the RPM package manager, so I installed rpm-build.

Step 3

“Download and install the source RPM for the client package.”

I did a web search for “mysqlclient-python source rpm” and found the rpmfind page containing many versions. If you click on the link in the “Package” column you will get to a page that has a link for the Source RPM. I chose the most recent (as of this writing) CentOS package.

So I downloaded the source RPM and installed it into the sources directory:

cd SRPMS
wget http://vault.centos.org/7.4.1708/os/Source/SPackages/MySQL-python-1.2.5-1.el7.src.rpm
cd ../SOURCES
rpm -Uvh MySQL-python-1.2.5-1.el7.src.rpm

This unpacks MySQL-python-1.2.5.zip and a patch file in the SOURCES directory and puts a spec file in the SPECS directory, so this is not as complicated as the PHP version.

Step 4

“Install compilers and dependencies”.
On my host I had no work to get any requirements installed (your mileage may vary – I had installed a lot of dependencies previously in my PHP test, and used the same machine). Make sure to include the Percona Server package for the /usr/lib64/mysql/plugin/dialog.so file:
yum install Percona-Server-server-55-5.5.55-rel38.8.el6.x86_64

Step 5

“Build the RPM file”.


rpmbuild -bb rpmbuild/SPECS/MySQL-python.spec

Then I installed my new package and tested it, and it worked!
# rpm -e MySQL-python
# rpm -Uvh /root/rpmbuild/RPMS/x86_64/MySQL-python-1.2.5-1.el6.x86_64.rpm
Preparing… ########################################### [100%]
1:MySQL-python ########################################### [100%]

I will not be continuing this experiment with any other clients (e.g. not going to try for Ruby) but I welcome others to do the same!

Lesson 09: Managing Users and Privileges in MySQL

Notes/errata/updates for Chapter 9:
See the official book errata at http://tahaghoghi.com/LearningMySQL/errata.php – Chapter 9 includes pages 297 – 350.

In the fourth paragraph of this chapter, starting with “Most applications don’t need superuser privileges for day-to-day activities” they give you some reasons why you want to create users without the SUPER privilege. There are better reasons than the book gives, which are at the MySQL Manual page for the SUPER privilege.

In the section “Creating and Using New Users” (p. 300) they say “There’s no limit on password length, but we recommend using eight or fewer characters because this avoids problems with system libraries on some platforms.” You should ignore this, this book was written in 2006 and modern system libraries can handle more than 8 characters in a password. Also ignore it when they say the same thing in the section “Understanding and Changing Passwords” (p. 324).

In the section “Creating a New Remote User” at the very end (p. 214), it talks about using % as a host wildcard character. I want to point out that if there are no ACL’s set for a given host, MySQL will reject ALL connections from that host – even “telnet host 3306” will fail. So if you avoid using %, you are slightly more secure.

In the “Anonymous Users” section (p. 315), one fact that is not mentioned is that for all users, including the anonymous user, any database named “test” or that starts with “test_” can be accessed and manipulated. So an anonymous user can create tables in the “test” database (or even “test_application”) and fill it full of data, causing a denial of service when the disk eventually fills up. This fact is mentioned later in the chapter in the “Default User Configuration” section under “Linux and Mac OS X”, but it should be known earlier.

The “mysqlaccess” utility described in the section of that name (p. 320) is usually not used. These days, folks prefer the pt-show-grants tool. Here is a blog post with some examples of pt-show-grants.

In the section on “Removing Users” (p. 324), it says that if all the privileges are revoked, and a user only has GRANT USAGE, “This means the user can still connect, but has no privileges when she does.” This is untrue, as mentioned before, everyone can access and manipulate databases starting with “test”.

The section “Managing Privileges with SQL” is deprecated (p. 339-346, up to and including “Activating Privileges”). It used to be, back when this was written, that few people used the GRANT statements and more people directly manipulated the tables. These days, it’s the other way around, and due to problems like SQL injection, there are safeguards in place – for example, if you change the host of a user with an ALTER TABLE on the mysql.user table, the user will have all privileges dropped. Just about the only thing direct querying is used for, is to find who has the Super_priv variable set to ‘Y’ in the user table.

Supplemental material: I have a video presentation on security which includes ACLs and there are accompanying PDF slides.

Topics covered:
Creating and dropping local and remote users
Different MySQL privileges
SUPER privilege
GRANT and REVOKE syntax
Hosts and wildcards
Anonymous and default users
Checking privileges
Password management
Basic user security
Resource limit controls

Reference/Quick Links for MySQL Marinate

Lesson 07: Advanced MySQL Querying

Notes/errata/updates for Chapter 7:
See the official book errata at http://tahaghoghi.com/LearningMySQL/errata.php – Chapter 7 includes pages 223 – 275.

Supplemental blog post – ORDER BY NULL – read the blog post and the comments!

GROUP BY and HAVING examples – Supplemental blog post. The example of HAVING in the text shows a use case where HAVING is the same function as WHERE. This blog posts shows examples of HAVING that you cannot do any other way.

In the section called “The GROUP BY clause”, on pages 231-232, the book says:
“you can count any column in a group, and you’ll get the same answer, so COUNT(artist_name) is the same as COUNT(*) or COUNT(artist_id).” This is not 100% true; COUNT does not count NULL values, so if you had 10 rows and 1 artist_name was NULL, COUNT(artist_name) would return 9 instead of 10. COUNT(*) counts the number of rows and would always return 10, so COUNT(*) is preferable when you intend to count the number of rows.

Also in that section, on page 233 when they show you the example:
SELECT * FROM track GROUP BY artist_id;
– Note that they explain the result is not meaningful. In most other database systems, this query would not be allowed.

In the “Advanced Joins” section, specifically on page 238 at the bottom where they say “There’s no real advantage or disadvantage in using an ON or a WHERE clause; it’s just a matter of taste.” While that’s true for the MySQL parser, it’s much easier for humans to read, and see if you missed a join condition, if you put the join conditions in an ON clause.

In the section on Nested Queries, on page 251, it says “nested queries are hard to optimize, and so they’re almost always slower to run than the unnested alternative.” MySQL has gotten better and better at optimizing nested queries, so this statement isn’t necessarily true any more.

A “derived table”, is a nested query in the FROM Clause, as described in the section heading with that name (p. 262).

In the “Table Types” subsection (p. 267), it says that MyISAM is a good choice for storage engines, and that “you very rarely need to make any other choice in small-to medium-size applications”. However, it’s recommended to use InnoDB for better concurrency, transaction support and being safer from data corruption in a crash situation. Indeed, the default storage engine in more recent versions of MySQL is InnoDB.

In addition, the lingo has been changed since the book was written; we now use “storage engine” instead of “table type”. The examples that use CREATE TABLE or ALTER TABLE with TYPE may need to be changed to STORAGE ENGINE instead of TYPE.

Finally, you can skip the section on BDB since it has been deprecated (p. 274-5).

Topics covered:
Aliases
Join style
Joins (JOIN, INNER, COMMA, STRAIGHT, RIGHT, LEFT, NATURAL)
UNION and UNION ALL
Data aggregation (DISTINCT, GROUP BY, HAVING
Subqueries and Nested Queries (including ANY, SOME, ALL, IN, NOT IN, EXISTS, NOT EXISTS, correlated subqueries, derived tables, row subqueries)
User Variables
Transactions/locking
Table Types/Storage engines

Reference/Quick Links for MySQL Marinate

Lesson 06: Working with Database Structures

Notes/errata/updates for Chapter 6:
See the official book errata at http://tahaghoghi.com/LearningMySQL/errata.php – Chapter 6 includes pages 179 – 222.

Other notes:
At the end of the “Creating Tables” section (p.183-4), it says “We like using the underscore character to separate words, but that’s just a matter of style and taste; you could use underscores or dashes, or omit the word-separating formatting altogether.” While this is true, beware of using a dash, because MySQL will try to interpret “two-words”, thinking – is a minus sign. I recommend avoiding dashes for this reason (even though the book does this on page 215).

At the end of the “Collation and Character Sets” section (p.186), it says “When you’re creating a database, you can set the default character set and sort order for the database and its tables.” Note that the default character set for the server will set the default character set for any new databases created if a default character set is not specified; there is no change in existing databases. In turn, the default character set for the database sets the default character set for any new tables created but does not change any existing tables, and the default character set for a table determines the default character set for each column, which can be overridden by specifying a character set when defining a column.

Under the “Other Features” section it references a section called “Table Types”. This section is in chapter 7, p. 267.

Under the “Other Features” section it shows the SHOW CREATE TABLE example (p. 187). By default, MySQL shows you output in horizontal format – that is, one table row is shown as one row in the output. However, you can have MySQL show you output in vertical format, where one column is shows as one row in the output. Instead of using ; to end a query, use \G

Try it with:
SHOW CREATE TABLE artist;
vs
SHOW CREATE TABLE artist\G

And see the difference.

In the “Column Types” section on page 194, it says that “Only one TIMESTAMP column per table can be automatically set to the current date and time on insert or update.” This is not true as of MySQL version 5.6.5 and higher. As per the documentation at https://dev.mysql.com/doc/refman/5.6/en/timestamp-initialization.html: “For any TIMESTAMP or DATETIME column in a table, you can assign the current timestamp as the default value, the auto-update value, or both.”

In the section called “The AUTO_INCREMENT Feature”, on page 211, it says “If, however, we delete all the data in the table, the counter is reset to 1.” The example shows the use of TRUNCATE TABLE. Note that if you deleted all the data in the table with DELETE, such as “DELETE FROM count WHERE 1=1;”, the counter is NOT reset.

Supplemental material:
Data types:
Podcast on Strings
Podcast on Numeric data types
Podcast on ENUM, SET and different SQL modes
Podcast on Times and time zones

Topics covered:
How to CREATE, DROP and ALTER databases, tables, columns and indexes
Collations and character sets
Data types
AUTO_INCREMENT

Reference/Quick Links for MySQL Marinate

MySQL Marinate – So you want to learn MySQL! – START HERE

Want to learn or refresh yourself on MySQL? MySQL Marinate is the FREE virtual self-study group is for you!

MySQL Marinate quick links if you know what it is all about.

This is for beginners – If you have no experience with MySQL, or if you are a developer that wants to learn how to administer MySQL, or an administrator that wants to learn how to query MySQL, this course is what you want. If you are not a beginner, you will likely still learn some nuances, and it will be easy and fast to do. If you have absolutely zero experience with MySQL, this is perfect for you. The first few chapters walk you through getting and installing MySQL, so all you need is a computer and the book.

The format of a virtual self-study group is as follows:
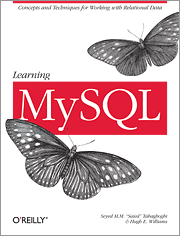
Each participant acquires the same textbook (Learning MySQL, the “butterfly O’Reilly book”, published 2007). You can acquire the textbook however you want (e.g. from the libary or from a friend, hard copy or online). Yes, the book is old, but SQL dates back to at least the 1970’s and the basics haven’t changed! There are notes and errata for each chapter so you will have updated information. The book looks like this:

O'Reilly Butterfly book picture
O’Reilly Butterfly book picture

Each participant commits to reading each chapter (we suggest one chapter per week as a good deadline), complete the exercises and post a link to the completed work.

Each participant obtains assistance by posting questions to the comments on a particular chapter.

Note: There is no classroom instruction.

How do I get started?

– Watch sheeri.com each week for the chapters to be posted.

– Get Learning MySQL
Acquire a book (the only item that may cost money). Simply acquire Learning MySQL – see if your local library has it, if someone is selling their copy, or buy it new.

– Start!
When your book arrives, start your virtual learning by reading one chapter per week. Complete the exercises; if you have any questions, comments or want to learn more in-depth, that’s what the comments for!

FAQs:
Q: Does this cover the Percona patch set or MariaDB forks?

A: This covers the basics of MySQL, which are applicable to Percona’s patched MySQL or MariaDB builds, as well as newer versions of MySQL.

Q: What do I need in order to complete the course?

A: All you need is the book and access to a computer, preferably one that you have control over. Windows, Mac OS X or Unix/Linux will work. A Chromebook or tablet is not recommended for this course.

Q: Where can I put completed assignments?

A: Completed assignments get uploaded to github. See How to Submit Homework

Q: The book was published in 2007. Isn’t that a bit old?

A: Yes! The basics are still accurate, and we will let you know what in the book is outdated. I have contacted O’Reilly, offering to produce a new edition, and they are not interested in updating the book. We will also have optional supplemental material (blog posts, videos, slides) for those who want to learn more right away. We are confident that this self-study course will make you ready to dive into other, more advanced material.

Soak it in!

Reference/Quick Links for MySQL Marinate

Cost/Benefit Analysis of a MySQL Index

We all know that if we add a MySQL index to speed up a read, we end up making writes slower. How often do we do the analysis to look at how much more work is done?

Recently, a developer came to me and wanted to add an index to a very large table (hundreds of gigabytes) to speed up a query. We did some testing on a moderately used server:

Set long_query_time to 0 and turn slow query logging on
Turn slow query logging off after 30 minutes.

Add the index (was on a single field)

Repeat the slow query logging for 30 minutes at a similar time frame (in our case, we did middle of the day usage on a Tuesday and Wednesday, when the database is heavily used).

Then I looked at the write analysis – there were no DELETEs, no UPDATEs that updated the indexed field, and no UPDATEs that used the indexed field in the filtering. There were only INSERTs, and with the help of pt-query-digest, here’s what I found:

INSERT analysis:
Query hash 0xFD7…..
Count: 2627 before, 2093 after
Exec time:
– avg – 299us before, 369us after (70us slower)
– 95% – 445 us before, 596us after
– median – 273us before, 301us after

I extrapolated the average per query to 2400 queries, and got:
**Total, based on 2400 queries – 71.76ms before, 88.56ms after, 16.8ms longer**

There was only one read query that used the indexed field for ORDER BY (or anywhere at all!), so the read analysis was also simple:

Read analysis:
Query hash 0xF94……
Count:187 before, 131 after
Exec time:
– avg – 9ms before, 8ms after. 1 ms saved
– 95% – 20ms before, 16 ms after
– median – 9ms before, 8 ms after

Again, extrapolating to average for 150 queries:
**Total, based on 150 queries: 150ms saved**

So we can see in this case, the index created a delay of 16.8 ms in a half-hour timeframe, but saved 150 ms in reads.

It is also impressive that the write index added very little time – 70 microseconds – but saved so much time – 1 millisecond – that there were 16 times the number of writes than reads, but we still had huge improvement, especially given the cost.

I cannot make a blanket statement, that this kind of index will always have this kind of profile – very tiny write cost for a very large read savings – but I am glad I did this analysis and would love to do it more in the future, to see what the real costs and savings are.

LDAP with auth_pam and PHP to authenticate against MySQL

Edited to add a link to the Python version.

In the quest to secure MySQL as well as ease the number of complicated passwords to remember, many organizations are looking into external authentication, especially using LDAP. For free and open source, Percona’s PAM authentication plugin is the standard option.

tl;dr is I go through how to compile php-cli for use with auth_pam plugin.

Background


There are two plugins that can be used. From the documentation, the two plugins are:

  • Full PAM plugin called auth_pam. This plugin uses dialog.so. It fully supports the PAM protocol with arbitrary communication between client and server.
  • Oracle-compatible PAM called auth_pam_compat. This plugin uses mysql_clear_password which is a part of Oracle MySQL client. It also has some limitations, such as, it supports only one password input. You must use -p option in order to pass the password to auth_pam_compat.

Percona’s MySQL client supports both plugins natively. That is, you can use auth_pam or auth_pam_compat and use the “mysql” tool (or “mysqldump”, or mysql_upgrade, etc.) and you are good to go. Given the choice, we would all use auth_pam, under which clients DO NOT use mysql_clear_password.

Not all clients support auth_pam, which is the main problem. Workarounds have called for using auth_pam_compat over SSL, which is a perfectly reasonable way to handle the risk of cleartext passwords – encrypt the connection.

However, what if you want to use auth_pam?

The problem with auth_pam

Back in 2013, Percona posted about how to install and configure auth_pam and auth_pam_compat. I will not rehash that setup, except to say that most organizations no longer use /etc/shadow, so the setup involves getting the correct /etc/pam.d/mysqld in place on the server.

That article has this gem:

As of now, only Percona Server’s mysql client and an older version of HeidiSQL(version 7), a GUI MySQL client for Windows, are able to authenticate over PAM via the auth_pam plugin by default.

So, if you try to connect to MySQL using Perl, PHP, Ruby, Python and the like, you will receive this error: “Client does not support authentication protocol requested by server; consider upgrading MySQL client.”

Fast forward 4 years, to now, and this is still an issue. Happily, the article goes on to explain how to recompile clients to get them to work:

The good news is that if the client uses libmysqlclient library to connect via MySQL, you can recompile the client’s source code to use the libmysqlclient library of Percona Server to make it compatible. This involves installing Percona Server development library, compiler tools, and development libraries followed by compiling and installing the client’s source code.

And, it helpfully goes step by step on how to recompile perl-DBD-mysql to get it working with LDAP authentication (as well as without – it still works for users who do not use LDAP).

But what if you are using PHP to connect to MySQL?

PHP and auth_pam


If you try to connect, you get this error:
SQLSTATE[HY000] [2054] The server requested authentication method unknown to the client

So let us try to mirror the perl recompilation process in PHP.

Step 1

“Install Percona yum repository and Percona Server development library.” This is not a problem, do what you need to do to install Percona-Server-devel for your version.

Step 2

Install a package manager so you can build a package – optional, but useful, if you ever want to have this new client without having to recompile. As in the example, I chose the RPM package manager, so I installed rpm-build.

Step 3

Download and install the source RPM for the client package. This is where I started running into trouble. What I did not realize was that PHP does not divide out its packages like Perl does. Well, it does, but php-mysqlnd is compiled as part of the core, even though it is a separate package.

Downloading the main PHP package


So I downloaded the source RPM for PHP at https://rpms.remirepo.net/SRPMS/, and installed it into the sources directory:
cd SRPMS
wget https://rpms.remirepo.net/SRPMS/php-7.0.22-2.remi.src.rpm
cd ../SOURCES
rpm -Uvh ../SRPMS/php-7.0.22-2.remi.src.rpm

This unpacks a main file, php-7.0.22.tar.xz, plus a bunch of supplemental files (like patches, etc).

What it does NOT contain is a spec file, which is critical for building the packages.

Getting a spec file


I searched around and found one at https://github.com/iuscommunity-pkg/php70u/blob/master/SPECS/php70u.spec – this is for 7.0.21, so beware of using different versions of spec files and source code. Once that was done, I changed the mysql lines to /usr/bin/mysql_config as per Choosing a MySQL library. Note that I went with the “not recommended” library, but in this case, we WANT to compile with libmysqlclient.

Compiling php-cli, not php-mysqlnd


In addition, I discovered that compiling php-mysqlnd with the new libraries did not work. Perhaps it was something I did wrong, as at that point I was still compiling the whole PHP package and every module in it.

However, what I *did* discover is that if I recompiled the php-cli package with libmysqlclient, I was able to get a connection via PHP using LDAP authentication, via a tool written by someone else – with no changes to the tool.

Final spec file


So here is the spec file I eventually came up with. I welcome any optimizations to be made!

Step 4

“Install compilers and dependencies”.
On my host I had to do a bunch of installations to get the requirements installed (your mileage may vary), including the Percona Server package for the /usr/lib64/mysql/plugin/dialog.so file:
yum install Percona-Server-server-55-5.5.55-rel38.8.el6.x86_64 libtool systemtap-sdt-devel unixODBC-devel

Step 5

“Build the RPM file”. Such an easy step, but it took about a week of back and forth with building the RPM file (which configures, tests and packages up everything), so I went between this step and updating the spec file a lot.


rpmbuild -bb /root/rpmbuild/SPECS/php-cli.spec

Then I installed my PHP file and tested it, and it worked!
# rpm -e php-cli –nodeps
# rpm -Uvh /root/rpmbuild/RPMS/x86_64/php70u-cli-7.0.22-2.ius.el6.x86_64.rpm –nodeps
Preparing… ########################################### [100%]
1:php70u-cli ########################################### [100%]

I hope you have similar success, and if you have updates to the spec files and lists of packages to install, please let me know!

Why does the MySQL optimizer not do what I think it should?

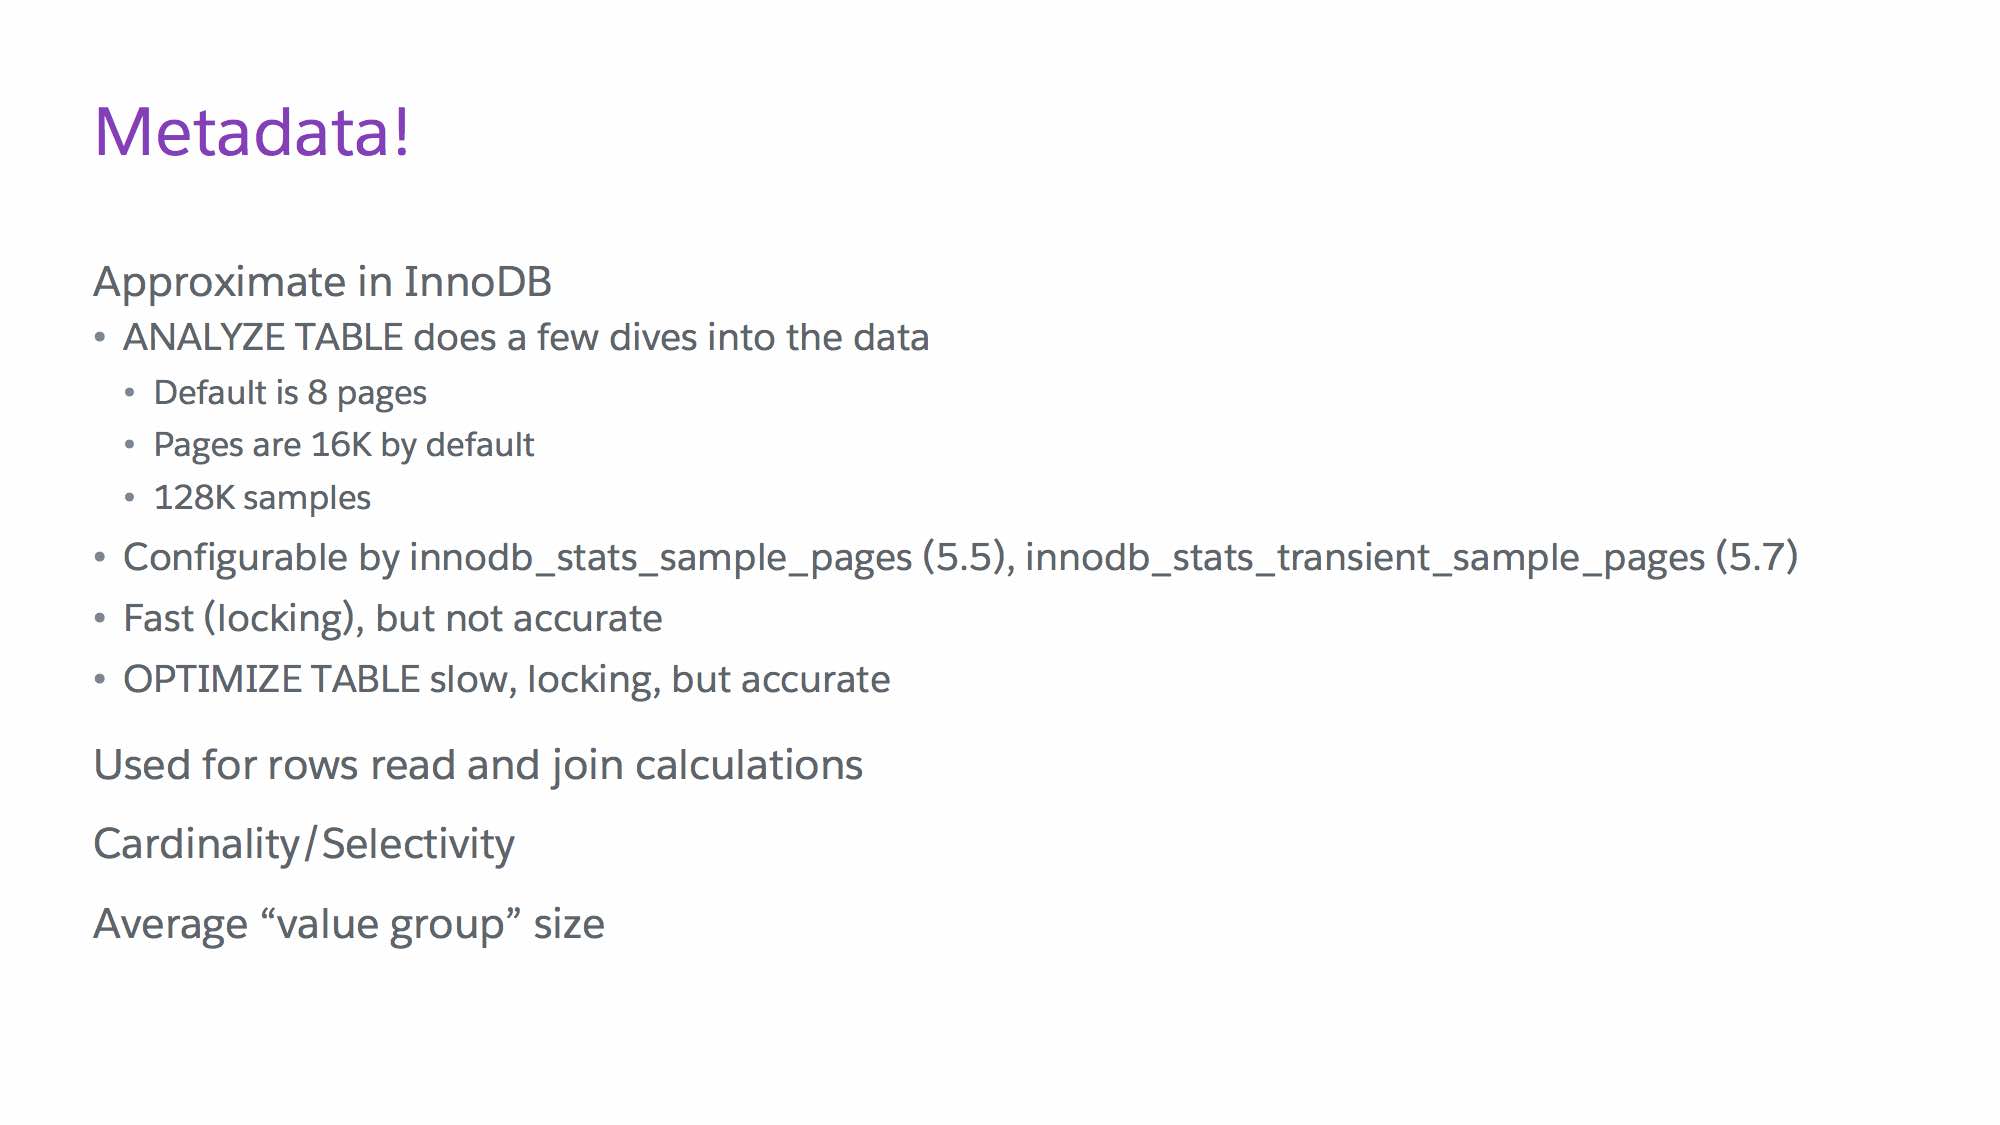
In May, I presented two talks – one called “Are you getting the best out of your indexes?” and “Optimizing Queries Using EXPLAIN”. I now have slides and video for both of them.

The first talk about indexing should probably be titled “Why is MySQL doing this?!!?!!?” It gives insight into why the MySQL optimizer chooses indexes that you do not expect; especially when it does not use an index you expect it to.

The talk has something for everyone – for beginners it explains B-trees and how they work, and for the more seasoned DBA it explains concepts like average value group size, and how the optimizer uses those concepts applied to metadata to make decisions.

Slides are at http://technocation.org/files/doc/2017_05_MySQLindexes.pdf.
Click the slide image below to go to the video at https://www.youtube.com/watch?v=e39-UfxQCCsSlide from MySQL indexing talk

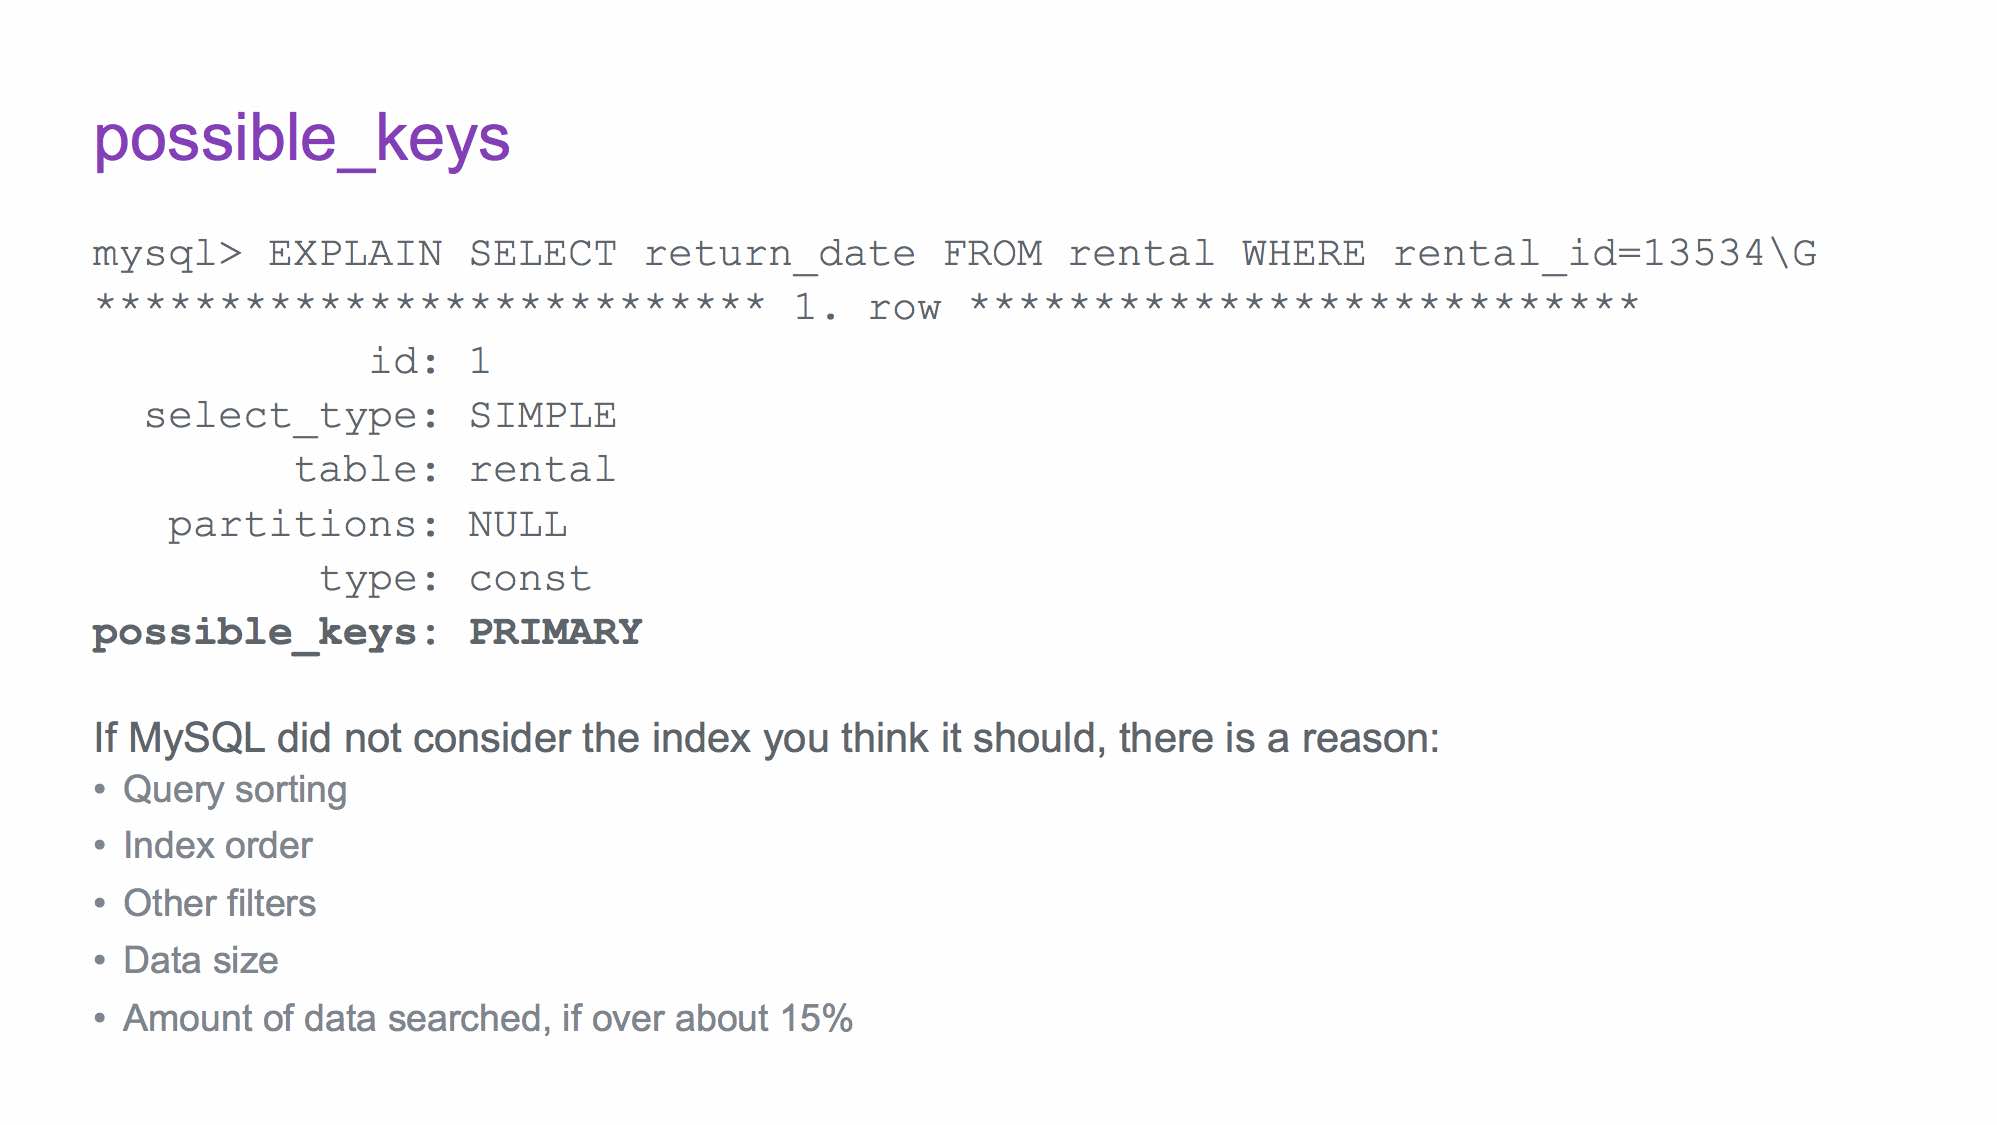
The EXPLAIN talk goes through everything in EXPLAIN – both the regular and JSON formats – and describes what the fields mean, and how you can use them to figure out how to best optimize your query. There are examples that show where you can find red flags, so that when you EXPLAIN your own queries, you can be better prepared for gotchas. The EXPLAIN talk references the indexing talk in a few places (both talks were given to the same audience, about a week apart), so I highly recommend you watch that one first.

Slides are at http://technocation.org/files/doc/2017_05_EXPLAIN.pdf.
Click the slide image below to go to the video at https://www.youtube.com/watch?v=OlclCoWXplgSlide image from the EXPLAIN talk

MySQL DevOps First Step: Revision Control

MySQL environments are notorious for being understaffed – MySQL is everywhere, and an organization is lucky if they have one full-time DBA, as opposed to a developer or sysadmin/SRE responsible for it.

That being said, MySQL is a complex program and it’s useful to have a record of configuration changes made. Not just for compliance and auditing, but sometimes – even if you’re the only person who works on the system – you want to know “when was that variable changed?” In the past, I’ve relied on the timestamp on the file when I was the lone DBA, but that is a terrible idea.

I am going to talk about configuration changes in this post, mostly because change control for configuration (usually /etc/my.cnf) is sorely lacking in many organizations. Having a record of data changes falls under backups and binary logging, and having a record of schema changes is something many organizations integrate with their ORM, so they are out of scope for this blog post.

Back to configuration – it is also helpful for disaster recovery purposes to have a record of what the configuration was. You can restore your backup, but unless you set your configuration properly, there will be problems (for example, an incompatible innodb_log_file_size will cause MySQL not to start).

So, how do you do this? Especially if you have no time?

While configuration management systems like chef, puppet and cfengine are awesome, they take setup time. If you have them, they are gold – use them! If you do not have them, you can still do a little bit at a time and improve incrementally.

If you really are at the basics, get your configurations into a repository system. Whether you use rcs, cvs, subversion or git (or anything else), make a repository and check in your configuration. The configuration management systems give you bells and whistles like being able to make templates and deploying to machines.

It is up to you what your deployment process is – to start, something like “check in the change, then copy the file to production” might be good enough, for a start – remember,  we’re taking small steps here. It’s not a great system, but it’s certainly better than not having any revision control at all!

A great system will use some kind of automated deployment, as well as monitoring to make sure that your running configuration is the same as your configuration file (using <A HREF=”https://www.percona.com/doc/percona-toolkit/3.0/pt-config-diff.html”>pt-config-diff). That way, there are no surprises if MySQL restarts.

But having a great system is a blog post for another time.

Upgrading from MySQL 5.1 to MariaDB 5.5

In my last post, a tale of two MySQL upgrades, a few folks asked if I would outline the process we used to upgrade, and what kind of downtime we had. Well, the processes were different for each upgrade, so … Continue reading

In my last post, a tale of two MySQL upgrades, a few folks asked if I would outline the process we used to upgrade, and what kind of downtime we had.

Well, the processes were different for each upgrade, so I will tackle them in separate blog posts. The first step was to upgrade all our MySQL 5.1 machines to MariaDB 5.5. As mentioned in the previous post, MariaDBs superior performance for subqueries is why we switched and we switched back to MySQL for 5.6 to take full advantage of the performance_schema.

It is not difficult to blog about our procedure, as we have documentation on each process. My first tip would be to do that in your own environment. This also enables other folks to help, even if they are sysadmins and not normally DBAs. You may notice the steps contain items that might be obvious to someone who has done maintenance before we try to write them detailed enough that if you were doing it at 3 am and a bit sleep-deprived, you could follow the checklist and not miss anything. This also helps junior and aspiring DBAs not miss any steps as well.

The major difference between MySQL 5.1 and MySQL 5.5 (and its forks, like MariaDB) is that FLOAT columns are handled differently. On MySQL 5.1, a float value could be in scientific notation (e.g. 9.58084e-05) and in 5.5, its not (e.g. 0.0000958084). This makes checksumming difficult, as all FLOAT values will show differences even when they are the same number. There is a workaround for this, devised by Shlomi Noach.

We have an n+1 architecture for databases at Mozilla this means that we have an extra server. If we need 1 master and 3 slaves, then n+1 is 1 master and 4 slaves. Because of this, there are 2 different ways we upgrade the first slave we upgrade, and subsequent slaves/masters.

These steps are copied and pasted from our notes, with minor changes (for example, item #2 is send out maintenance notices but in our document we have the e-mail addresses to send to).

Assumptions: Throughout these notes we use /var/lib/mysql, as that is our standard place for MySQL. You may need to change this to suit your environment. We are also using Red Hat Enterprise Linux for our operating system, so this procedure is tailored to it (e.g. yum install/yum remove). We control packages using the freely available puppet mysql module we created.

For the first slave
The overall procedure is to perform a logical backup the database, create a new empty installation of the new server version, and import the backup. Replication does work from MySQL 5.1 to MariaDB 5.5 and back (at least, on the 25 or so clusters we have, replication worked in both directions. Your mileage may vary).

1. Make sure the slave has the same data as the master with checksums (the previous checksum is fine, they should be running every 12 hours).

2. Send out maintenance notices.

3. Take the machine out of any load balanced services, if appropriate

4. Set appropriate downtimes in Nagios

5. Start a screen session on the server

6. Do a SHOW PROCESSLIST to see if there are any slaves of the machine. If so, move them to another master if they are needed. [we have a different checklist for this]

7. Do a SHOW SLAVE STATUS to see if this machine is a slave.
a. If this machine is a slave, ensure that its master will not delete its binlogs while the upgrade is occurring.

b. If this machine is a slave, do a SLAVE STOP; and copy the master.info file somewhere safe [or the slave_master_info table if using that]

8. Stop access to the machine from anyone other than root (assuming you are connecting from root):

UPDATE mysql.user SET password=REVERSE(password) WHERE user!='root'; FLUSH PRIVILEGES;

9. See what the default character set is for the server and databases:
SHOW VARIABLES LIKE 'character_set_server'; SHOW VARIABLES LIKE 'character_set_database';
SELECT SCHEMA_NAME FROM INFORMATION_SCHEMA.SCHEMATA WHERE DEFAULT_CHARACTER_SET_NAME!='utf8' AND SCHEMA_NAME NOT IN ('mysql');

If applicable, change the server defaults to UTF8 and change databases to utf8 with ALTER DATABASE dbname DEFAULT CHARACTER SET utf8;

10. Stop access to the machine from anyone other than root (assuming you are connecting from root): UPDATE mysql.user SET password=REVERSE(password) WHERE user!='root'; FLUSH PRIVILEGES;

11. Check to see how big the data is:
mysql> SELECT SUM(DATA_LENGTH)/1024/1024/1024 AS sizeGb FROM INFORMATION_SCHEMA.TABLES WHERE TABLE_SCHEMA!='information_schema';

12. Determine how you can export the data, given the size. You may be able to export without compression, or you may need to do a mysqldump | gzip -c > file.sql, then compress the old data files instead of just moving them aside.

13. Do a du -sh * of the datadir and save for later, if you want to compare the size of the database to see how much space is returned after defragmenting

14 .Export the data from all databases, preserving character set, routines and triggers. Record the time for documentations sake. Im assuming the character set from step 9 is utf8 (if its something like latin1, youll need to put in default-character-set=latin1 in the command). If the machine has slaves, make sure to use master-data=1. If you need to compress, change the shell command accordingly:
time mysqldump --all-databases --routines --triggers --events > `date +%Y-%m-%d`_backup.sql

15. Stop MySQL

16. Copy the config file (usually /etc/my.cnf) to a safe place (like /etc/my.cnf.51)

17. Do a rpm -qa | egrep -i "percona|mysql". Do a yum remove for the mysql/percona packages. Its OK if it also removes related packages, like perl-DBD, but make a note of them, because you will want to reinstall them later. Sample:
yum remove Percona-Server-client Percona-Server-shared-compat Percona-XtraDB-Cluster-devel Percona-Server-server

18. Move the /var/lib/mysql directory to /var/lib/mysql-old. Compress any files that need compression (if you need to compress, to decompress the sql file). If you absolutely cannot keep the files, see if you can copy them somewhere. We really want to preserve the old data directory just in case we need to revert.

19. Decompress the sql file, if applicable.

20. Install the proper packages by changing puppet to use maridb55 instead of mysql51 or percona51. Verify with rpm -qa | egrep -i percona|mysql|maria

[this may be different in your environment; we use the freely available puppet mysql module we created.

21. Run mysql_install_db

22. Make any changes to /etc/my.cnf (e.g. run puppet). When going from MySQL 5.1 to 5.5, there are no particular global changes Mozilla made.

– when we went from MySQL 5.0 to MySQL 5.1, we did a global change to reflect the new slow query log options.

23. chown -R mysql:mysql /var/lib/mysql/

24. chmod 775 /var/lib/mysql

25. Start MySQL and check the error logs for any warnings. Get rid of any warnings/errors, and make sure MySQL is running.

26. Turn off binary logging. Import the export, timing how long it takes, for reference:

time mysql < YYYY_MM_DD_backup.sql

27. Restart MySQL and look for errors, you may need to run mysql_upgrade.

28. Turn on binary logging, if applicable.

29. Test.

30. If this machine was a slave, re-slave it. Let it catch up, making sure there are no data integrity errors, and no replication errors.

31. Reinstate permissions on the users:
UPDATE mysql.user SET password=REVERSE(password) WHERE user!='root'; FLUSH PRIVILEGES;

32. Re-slave any slaves of this machine, if needed.

33. Turn back on Nagios, making sure all the checks are green first.

34. Run a checksum on the master to propagate to this slave, and double-check data integrity on the slave. Note that you will want to use –ignore-columns with the output of this command in the checksum, to avoid false positives from scientific notation change (see http://www.sheeri.com/mysql-5-1-vs-mysql-5-5-floats-doubles-and-scientific-notation/)

Find FLOAT/DOUBLE fields to ignore in checksum: SELECT GROUP_CONCAT(DISTINCT COLUMN_NAME) FROM INFORMATION_SCHEMA.COLUMNS WHERE DATA_TYPE IN ('float','double') AND TABLE_SCHEMA NOT IN ('mysql','information_schema','performance_schema');

35. Put the machine back into the load balancer, if applicable.

36. Inform folks the upgrade is over

On the first upgrade, we did what is usually recommended – do a logical export with mysqldump, and then an import. With other upgrades in the same replication hierarchy, we can take advantage of Xtrabackup to stream the new version directly to the machine to be upgraded.

The general procedure here is similar to the above, except that a logical export is not taken. After preparation steps are taken, a new empty MariaDB 5.5 server is installed. Then we use xtrabackup to backup and restore the existing MariaDB 5.5 server to the machine we are upgrading.

For subsequent slaves, and the master

  1. Coordinate with affected parties ahead of time
  2. Send out any notices for downtime
  3. Take the machine out of any load balanced services, if appropriate. If the machine is a master, this means failing over the master first, so that this machine becomes a regular slave. [we have a different checklist for how to failover]
  4. Set appropriate downtimes in Nagios, including for any slaves
  5. Start a screen session on the server
  6. Do a SHOW PROCESSLIST to see if there are any slaves of the machine. If so, move them to another master if they are needed.
  7. Do a SHOW SLAVE STATUS to see if this machine is a slave.
    1. If this machine is a slave, ensure that the master will not delete its binlogs while the upgrade is occurring.
    2. If this machine is a slave, do a SLAVE STOP; and copy the master.info file somewhere safe
    3. If this machine is a slave, do a SLAVE STOP; and copy the master.info file somewhere safe
  8. Save a list of grants from pt-show-grants, just in case there are users/permissions that need to be preserved.  [this is done because sometimes masters and slaves have different users, though we try to keep everything consistent]
  9. Figure out how big the backup will be by doing a du -sh on the datadir of the already-upgraded machine to be backed up, and make sure the new machine has enough space to keep the old version and have the new version as well.
  10. Stop MySQL on the machine to be upgraded.
  11. Copy the config file (usually /etc/my.cnf) to a safe place (like /etc/my.cnf.51)
  12. Do a rpm -qa | egrep -i "mysql|percona". Do a yum remove for the mysql packages (at least mysql-server, mysql). Its OK if it also removes related packages, like perl-DBD, but make a note of them, because you will want to reinstall them later.
  13. Move the /var/lib/mysql directory to /var/lib/mysql-old. Compress any files that need compression. If you absolutely cannot keep the files, see if you can copy them somewhere. We really want to preserve the old data directory just in case we need to revert.
  14. Install the proper packages by changing puppet to use maridb55 instead of mysql51 or percona51, running puppet manually. Verify with rpm -qa | egrep -i "percona|mysql|maria"
  15. Run mysql_install_db
  16. Make any changes to /etc/my.cnf (or run puppet). When going from MySQL 5.1 to 5.5, there are no particular changes.
  17. chown -R mysql:mysql /var/lib/mysql/
  18. chmod 775 /var/lib/mysql
  19. Start MySQL and check the error logs for any warnings. Get rid of any warnings/errors, and make sure MySQL is started.
  20. Stop MySQL, and move or delete the datadir that was created on upgrade.
  21. If you are directly streaming the backup to the machine to be upgraded, do this on the machine to be upgraded:
    cd $DATADIR
    nc -l 9999 | tar xfi -
  22. On the machine to be backed up (that is already upgraded), in a screen session, making sure you get any slave info:
    time innobackupex --slave-info --stream=tar $DATADIR | nc (IP/hostname) 9999
  23. Once xtrabackup is complete, fix permissions on the datadir:
    chown -R mysql:mysql /var/lib/mysql/
    chmod 775 /var/lib/mysql
  24. Prepare the backup:
    time innobackupex --apply-logs --target-dir=/var/lib/mysql
  25. Fix permissions on the datadir again:
    chown -R mysql:mysql /var/lib/mysql/
    chmod 775 /var/lib/mysql
  26. Restart MySQL and look for errors
  27. Test.
  28. If this machine was a slave, re-slave it. Let it catch up, making sure there are no data integrity errors, and no replication errors.
  29. Re-slave any slaves of this machine, if needed.
  30. Turn back on Nagios, making sure all checks are green first.
  31. Put the machine back into the load balancer, if applicable.
  32. Inform folks the upgrade is over

Its long and detailed, but not particularly difficult.